Tuesday, May 15, 2012

Skinni Chocolate PB2 Peanut Butter Cream Puffs

Pin It Now!
Skinni Chocolate PB2 Peanut Butter Cream Puffs

These Cream Puffs include everything good in life! This is a bite size yummy desert that you won’t feel guilty eating. I’m kind of obsessed with these cream puffs and you will be too!


Ingredients
1.       ½ cup of water
2.       1 packet of unflavored gelatin (I believe that this would be about 1 tablespoon)
3.       1-8 ounce container of fat free cream cheese
4.       8 tablespoons of chocolate PB2 peanut butter powder (or ¼ cup)
5.       1/3 cup Splenda
6.       1-8 ounce container of fat free Cool Whip
7.       1-100 calorie Oreo Snack pack (crushed)

Directions
1.       Bring ½ cup water to boil and add the unflavored gelatin. Stir the gelatin until there are no lumps. I will usually measure my water in a glass bowl and heat in microwave for 2-3 minutes on high to get the water to boil.
2.       Allow water to cool (not too much because you do not want gelatin to form just yet, but cool enough to touch).
3.       Add the chocolate PB2, Splenda, and cream cheese. Mix with a mixer well until there are no lumps.
4.       Add half the container of Cool Whip. Save the other half for topping.
5.       Line a 24 mini cup cake pan with cup cake liners and spray with non stick spray.
6.       Using a tablespoon, measure a scoop into each of the 24 cup cake liners. Place in refrigerator for an hour.
7.       Add the other half of the Cool Whip as a topping of the cream puffs. Use a tablespoon to top each of the puffs with Cool Whip. Sprinkle the Oreos evenly across your chocolate peanut butter cream puffs. Place back in refrigerator for another hour.
8.       These chocolate peanut butter cream puffs will take you to cloud nine! Enjoy!


*Skinni Chocolate PB2 Peanut Butter Cream Puffs are about 40 calories per puff so have more than one!
Pin It Now!

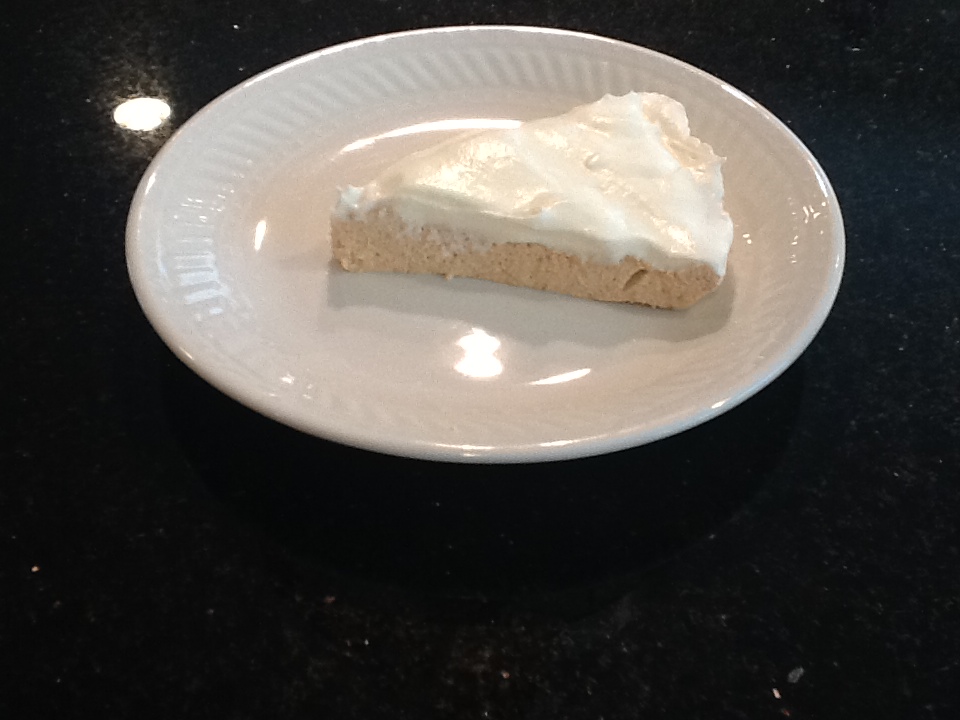
Skinni PB2 Peanut Butter Cream Pie (Crust less)

Pin It Now!
Skinni PB2 Peanut Butter Cream Pie (Crust less)

This recipe is using PB2 Peanut Butter and is absolutely delightful! I made this recipe without a crust to help save on unnecessary calories. Personally I like the creamy filling for the most part, so why waste the money and calories on something that I’m not going to eat!


Ingredients
1.       ½ cup of water
2.       1 packet of unflavored gelatin (I believe that this would be about 1 tablespoon)
3.       1-6 ounce container of plain non-fat Greek yogurt
4.       8 tablespoons of PB2 peanut butter powder (or ¼ cup)
5.       1/3 cup Splenda
6.       1-8 ounce container of fat free Cool Whip

Directions
1.       Bring ½ cup water to boil and add the unflavored gelatin. Stir the gelatin until there are no lumps. I will usually measure my water in a glass bowl and heat in microwave for 2-3 minutes on high to get the water to boil.
2.       Allow water to cool (not too much because you do not want gelatin to form just yet, but cool enough to touch).
3.       Add the PB2, Splenda, and Greek yogurt. Mix well until there are no lumps.
4.       Add half the container of Cool Whip. Save the other half for topping.
5.       Pour the peanut butter mixture into a non-stick sprayed pie pan. Place in refrigerator for an hour.
6.       Add the other half of the Cool Whip as a topping across the pie. Place back in refrigerator for another hour.
7.       Cut into 8 pieces.
8.       Enjoy your fluffy peanut butter cream pie!
 *These little slices of peanut butter heaven come in at less than 90 calories per slice!


Pin It Now!

Monday, May 14, 2012

Taste-PB2

Pin It Now!
Taste

Everyone asks me where to buy PB2, and I buy it at Taste in Decatur. This is my new favorite store to buy kitchen and cooking supplies! Taste is where I buy my PB2 from. Marcy, the owner, always makes sure that she has both the original PB2 and Chocolate PB2. Taste even has a section with all products from Georgia, so you are able to get items made in the state. PB2 comes from right down the road in Tifton, Georgia! I go in there almost every week to replenish my stock of PB2. Just last week I missed Sugarland by a couple of minutes! If you get a chance, stop in, there are really cute kitchen supplies to decorate and use in your kitchen, and of course there is PB2!

 416 Church Street
Decatur, GA 30030
404-370-1863
Pin It Now!

Thursday, May 10, 2012

Skinni Strawberry Shortcake

Pin It Now!
Skinni Strawberry Shortcake


Strawberry Shortcake has been my one of my favorite deserts since childhood. I like the lightness of the cake and cool whip and the sweet tartness that the strawberries give. Unlike most strawberry shortcakes, this one uses fresh strawberries instead of soaking the strawberries in sugary syrup. I personally do not find this necessary, especially since strawberries have such a sweet taste by themselves!

Ingredients
1.       Slice of Skinni Sugar Free Angel Food Cake
2.       1 cup of sliced strawberries
3.       2 tablespoons of fat free cool whip

Directions
1.       Place cake slice in a bowl.
2.       Add the sliced strawberries on top of the cake.
3.       Top the cake with the cool whip.
4.       Enjoy your low calorie slice of strawberry shortcake!

*Strawberry Shortcake has never tasted better, especially when it is 125 calories per serving!
*If you don’t have any fresh strawberries, any other fresh fruit would work. The only problem then is that you can’t call it Strawberry Shortcake!
Pin It Now!

Tuesday, May 8, 2012

Skinni Sugar Free Angel Food Cake

Pin It Now!
Skinni Sugar Free Angel Food Cake


This recipe is for a light and fluffy sugar free angel food cake. Angel Food Cake makes a great foundation for so many deserts, so once you master it the sky is the limit!

Ingredients
1.       1 cup of sifted cup of Cake Flour- I will sift the flour before I measure.
2.       1 ½ cups of Splenda
3.       ½ teaspoon salt
4.       12 egg whites
·         Make sure to use actual egg whites and not egg whites from the box.
·         When separating your egg whites, add the egg to the mixing bowl after each separating each egg.
·         This will ensure that if you have a bad egg it will not ruin the entire batch.
·         Always have a couple extra eggs on hand, there is almost always a mess up!
5.       1 tablespoon of water
6.       1 teaspoon of vanilla
7.       1 teaspoon of cream of tartar

Directions
1.       Pre-heat the oven to 350 degrees.
2.       Sift the dry ingredients together (cake flour, splenda, salt, and cream of tartar).
3.       In another bowl, beat the egg whites, water, and vanilla with a mixer on high until peaks form.
4.       Fold in the mixed dry ingredients with the egg whites. Do this gently with a silicone spatula until the cake batter is mixed together.
5.       Pour the cake batter into an un-greased 10-inch tube pan. I have a removable bottom in my pan which makes the cake removal process much simpler.
6.       Bake for 35-40 minutes.
7.       Allow to cool in the pan. Run a knife around the edges before removing the cake from the pan and placing it on a plate. Slice into 12 pieces.
8.       Enjoy your slice of sugar free angle food!


*At 62 calories per slice, sugar free angel food cake will make an excellent desert or an addition to several other deserts!
Pin It Now!

Skinni Fresh Fruit Roll-Ups

Pin It Now!
Skinni Fresh Fruit Roll-Ups


Faced with the problem of way too many strawberries (not a huge problem), I decided to make my own fresh fruit roll-ups! My mom used to make these for me when I was a kid. Being the oldest, my mom always made me the fresh fruit roll-ups. My sisters got the store bought fruit roll-ups by the time they came around. I guess there are some advantages to being the oldest! I used strawberries in this recipe because they are my favorite, but any fruit would be great.

Ingredients
1.      4 cups cut strawberries (or any fruit)
2.      ½ fresh squeezed lemon (about 2 teaspoons)
3.      Lemon zest (optional, but why not since you have a lemon?)
4.      Splenda to taste (I put ½ teaspoon at a time to my desired sweetness)

Directions
1.      Pre-heat the oven to 170 degrees (if your oven goes lower then heat to 140 degrees).
2.      Put all of the fruit, lemon juice, and lemon zest into a food processor and blend until purified.
3.       Add your Splenda to taste.
4.       Line your baking pan with plastic wrap (do not use wax or parchment paper because it will stick).
5.      Spread the fruit mixture on pan, trying not to leave any holes.
6.      Cook the fruit for 6-8 hours. The longer you are able to cook it, the dryer the fruit will become and this is the goal. If unable to cook for that long, and then cook for at least 4 hours and then leave the fruit in the oven without opening the door (so the heat is trapped in and continues to cook). This is best to do overnight, and then you can wake up to fresh fruit roll-ups.
7.      Allow the pan to cool.
8.      Flip the pan and fruit onto a cutting board where the plastic is on top.
9.      Carefully peel the plastic away, displaying your beautiful dried fruit!
10.  Place a layer of wax paper over top of the fruit (where the plastic was before).
11.  Take a pizza cutter or scissors (I just hand wash a pair of mine) and cut your desired pieces of roll-ups. I prefer the fruit-by-the-foot, but it’s your choice!
12.  Enjoy this wonderful treat!

My version of fruit by the foot!


*Kids love this snack! I let my students try them and they loved their “healthy” fruit roll-up!

Just out of the oven!

After I carefully peeled the plastic away.

After adding the wax paper.

Pin It Now!

Bobbi's Skinni Cookin'